
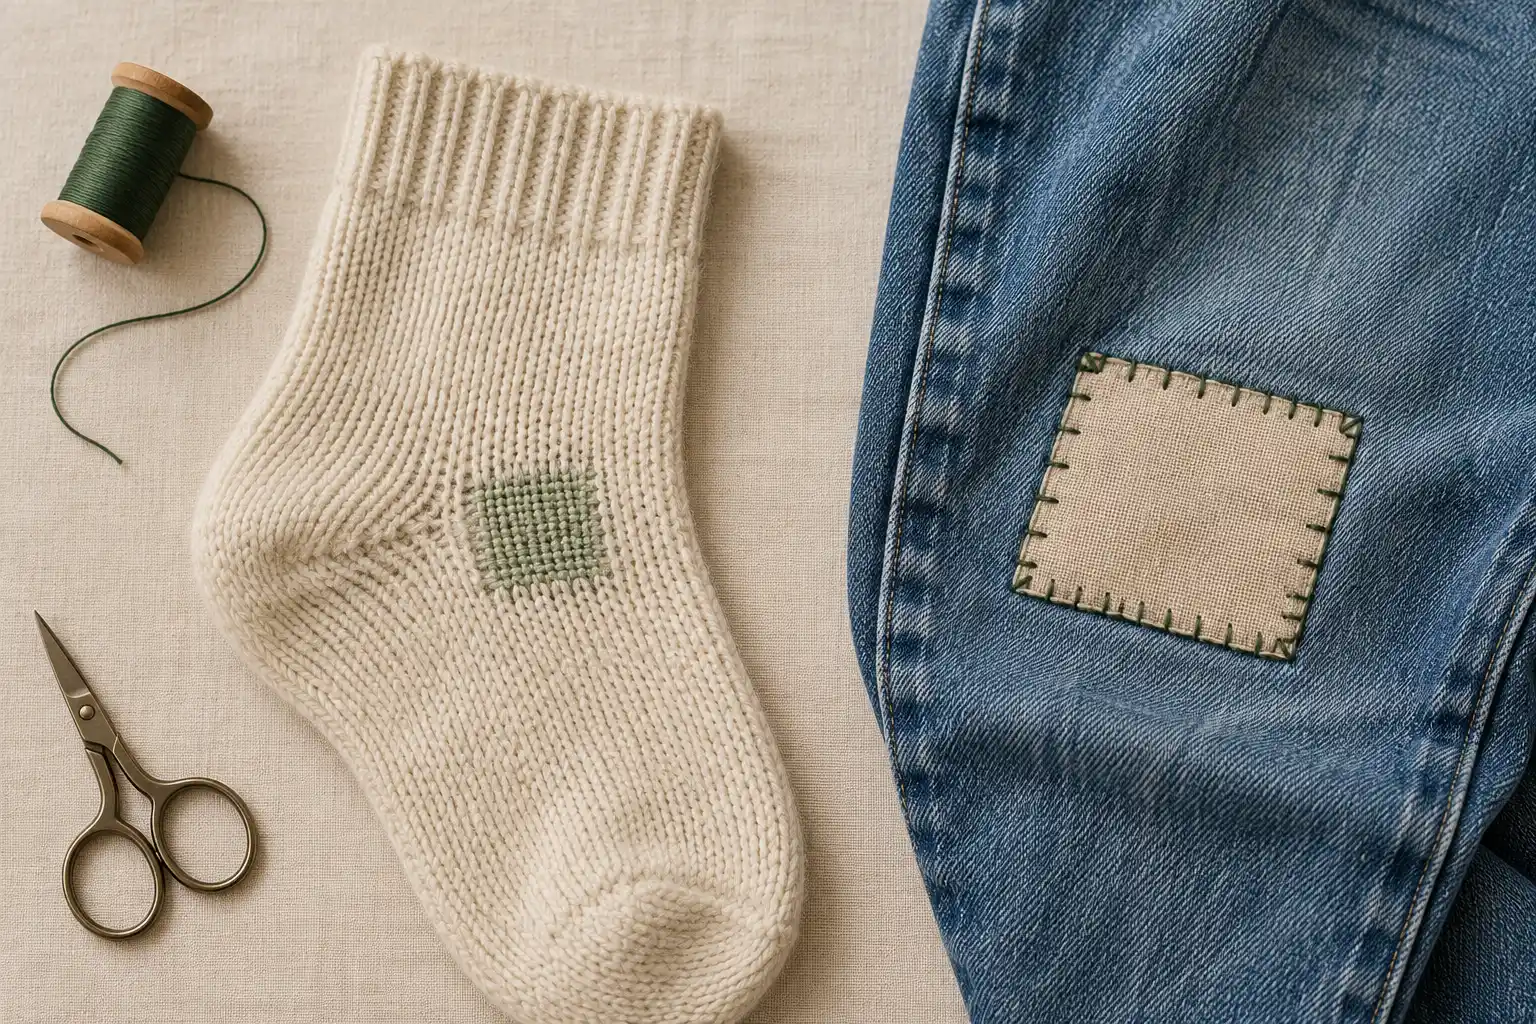
Darning rebuilds or reinforces a damaged area using thread or yarn. Patching adds a separate piece of fabric to cover and support the damage. Both can extend the useful life of clothing, but they solve problems in different ways.
The right choice depends on more than the size of the hole. You also need to consider the fabric’s structure, the condition of the surrounding material, and how the repaired area needs to move.
Before choosing either method, check whether the problem is actually an open seam. If the original stitching has broken but the fabric remains intact, resewing the seam may be all that is needed.
Darning and patching at a glance
| Question | Darning | Patching |
|---|---|---|
| What creates the repair? | New thread or yarn worked through and around the damaged area | A separate piece of fabric attached to the garment |
| Is extra fabric required? | Not always; the method determines whether support is needed | Yes |
| Where is it commonly considered? | Localized wear and holes in socks, knitwear, and some woven fabrics | Holes, tears, and worn areas that can support an additional layer |
| What affects comfort? | Yarn thickness, stitch density, tension, and finishing | Patch weight, flexibility, placement, and edge treatment |
| Can it be visible? | Yes, particularly with contrasting yarn or thread | Yes, depending on fabric choice and attachment |
| Is it automatically stronger? | No; suitability and execution matter | No; a patch must attach to material that can support it |
These are starting points rather than fixed rules. A small hole in fine jersey may need a different approach from a similar-sized hole in a thick sweater.
What is darning?
Darning uses thread or yarn to restore support where fabric has worn thin or developed a hole.
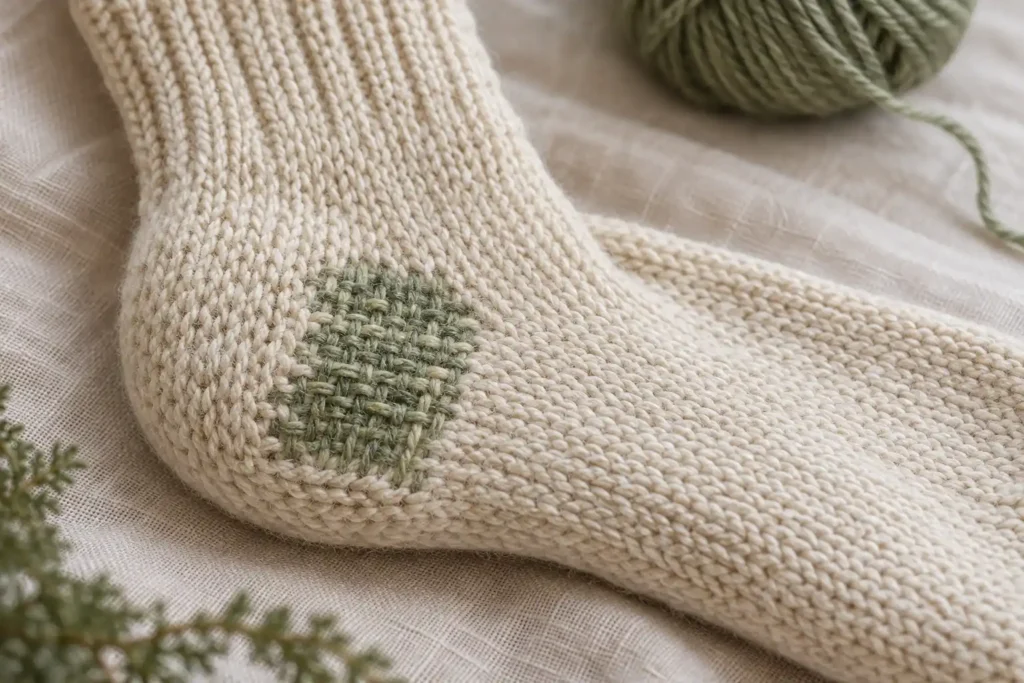
There are several approaches. A woven darn creates crossing threads that form a new structure over the damaged area. Other methods follow or recreate existing knitted stitches.
This distinction matters because “darning” does not describe one stitch that works on every garment. The method should suit the material and the type of damage.
When darning may be worth considering
Darning can be useful when:
- Damage is localized rather than spread across a large, fragile area.
- Suitable thread or yarn is available.
- The surrounding fabric can support the new stitches.
- The repair can retain the flexibility required in that location.
- You can reach the area and manage loose yarns or fabric edges.
For example, a small hole in a knitted sock may suit a woven darn. A worn section of a sweater may benefit from reinforcement before the yarn breaks completely.
However, a repair that is too dense or uses oversized yarn can feel noticeably firmer than the original material. On a sock, that extra thickness may become uncomfortable inside a shoe.
What is patching?
Patching attaches additional fabric to a garment. The patch covers or supports the damaged area, while the attachment stitches connect it to sound material around the damage.
A patch should not be sized only to the visible opening. Fabric may be weakened beyond the hole, and the stitches need a reliable place to hold.
Outside patches and inside patches
An outside patch sits on the visible surface of the garment. It can make the patch edge easier to see and control while sewing.
An inside patch sits behind the damaged area. It may produce a different appearance, but it does not automatically make the repair invisible. Fraying, missing fabric, and attachment stitches may still show.
Neither placement is universally better. Consider access, appearance, friction, and how the extra layer will feel during wear.
When patching may be worth considering
A patch can be useful when:
- There is missing fabric or a tear that needs additional support.
- Sound cloth surrounds the damaged area.
- A compatible patch material is available.
- The extra layer will not interfere with fit or movement.
- You can attach it without catching an unintended layer.
An accessible hole in stable, non-stretch denim is one possible beginner project. A large area of inner-thigh wear is more demanding because friction, movement, and widespread thinning may all be involved.
First, check whether you need either method
Turn the garment inside out and inspect the opening in good light.
If two intact fabric edges have separated because their joining stitches failed, you are looking at a seam problem. An appropriate seam repair may reconnect them without adding a patch or creating a darn.
If the cloth has torn beside an intact seam, the situation is different. Sewing the torn edges together may concentrate strain in material that is already weak.
Ask:
- Has the sewing thread broken?
- Has the fabric itself broken?
- Is any material missing?
- Does the cloth around the opening still feel sound?
Do not pull hard to test a fragile garment. If ordinary handling makes the damage spread, pause and reassess the project.
Four checks to make before choosing a repair
1. Identify the fabric’s structure
Fiber content and fabric structure are different things.
A woven cotton shirt and a cotton jersey T-shirt may share the same fiber but behave differently. Woven cloth has intersecting yarns; knitted fabric is formed from connected loops.
That difference affects stretch, how damage develops, and how a repair can be supported.
If you cannot identify the structure, inspect a similar scrap or seek more specific guidance before selecting a technique.
2. Examine the full worn area
Look beyond the hole.
A small opening surrounded by strong cloth presents a different problem from a small opening in a broad area of thinning fabric. A repair attached only to the weakened section may fail around its edges.
This applies to both methods. A darn needs suitable anchoring, and a patch needs sound material to carry its attachment stitches.
3. Consider movement and friction
Think about the garment in use:
- A knee bends.
- A cuff stretches over the hand.
- An inner thigh experiences rubbing.
- A sock heel sits inside a shoe.
- A shirt underarm moves as the arm lifts.
A repair needs to accommodate the movement required in its location. Adding stiffness or bulk can affect comfort even when the stitching looks tidy.
4. Compare the repair materials
For darning, consider the thickness and behavior of the new thread or yarn.
For patching, compare the patch’s weight, structure, stretch, and care requirements with the garment.
A matching color does not establish compatibility. A visually discreet patch can still feel rigid, while a contrasting repair can remain comfortable if its materials and construction suit the clothing.
Three examples to help you decide
Example 1: A small hole in a wool sock
The surrounding knit is in reasonable condition, and the damaged area is accessible.
Darning is worth investigating because it can bridge localized damage without introducing a separate fabric patch. Choose a method and yarn appropriate to the sock, then pay particular attention to thickness and finishing.
If the sole is thin across a much larger area, repairing only the visible hole may leave the rest vulnerable.
Example 2: A hole in non-stretch jeans
The denim around the opening is sound, and the damage is away from a bulky seam.
A compatible fabric patch may provide useful support. Its dimensions need to account for the worn area, attachment, and movement—not just the opening.
For a first project, avoid assuming the same method will work unchanged on stretch jeans or a high-friction crotch repair.
Example 3: An open seam on a woven shirt
The stitching has come undone, but the fabric edges and seam allowances are intact.
Start with a seam-repair method. Darning or patching would add work and material that may not be necessary.
If inspection reveals torn cloth beside the seam, reconsider the repair before stitching.
Does one method last longer?
There is no universal winner.
Durability depends on the original fabric, the extent of wear, material compatibility, technique, and how the garment is used and cared for afterward.
A patch attached to weak cloth may pull away. A darn that restricts movement may place strain on nearby yarns. Neither problem is solved simply by using thicker thread or adding more stitches.
Check the repair during construction, after trying on the garment, and again after washing and drying according to compatible care instructions.
Common mistakes to avoid
- Choosing by hole size alone: surrounding wear and fabric structure matter too.
- Sewing into fragile edges: both techniques need appropriate support.
- Using an overly heavy repair material: bulk and stiffness can affect comfort.
- Pulling the stitches too tightly: tightness can distort the garment rather than improve it.
- Expecting an invisible finish: discreet restoration may require specialist skills.
- Skipping the inside check: loops, knots, and trapped layers can cause problems that are not visible from the front.
A quick decision checklist
Before choosing a tutorial, complete these statements:
- The garment is made from __________.
- The problem is failed stitching, thinning material, or a hole.
- The surrounding fabric is __________.
- This area needs to bend, stretch, rub, or remain relatively stable.
- My repair materials are compatible with __________.
- I can access the area without sewing another layer shut.
Then choose instructions for that specific situation.
For localized knitwear damage, investigate an appropriate darning method. For a hole in stable woven cloth, consider a compatible patch. For intact fabric separated along a seam, start with resewing the seam.
If the fabric is deteriorating broadly, the garment is valuable, or you cannot assess the damage confidently, an experienced repairer can help you choose a suitable approach.